Wednesday, November 29, 2006
The Liner
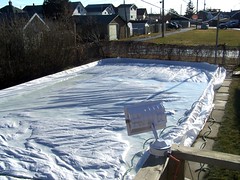
The liner is in!
It actually didn't take as long to lay out as I thought.... With the help of 3 trusty helpers we were able to get it down in less than an hour.
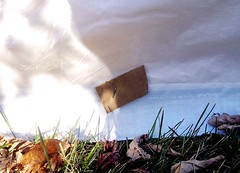
On the far end and left side of the rink (as per the picture), I pulled the liner over the boards and stapled the liner to the outside of the frame using a small piece cardboard to add some strength.
The tarp is 60x40, while my rink is only 48x22... So we rolled up the tarp on the other two ends. I didn't fasten these sides yet - I wanted to get water into the area and still have some room to let some tarp go back inside. The last thing I wanted to happen was have the weight of the water rip the tarp off of the boards - and end up flooding my yard...
So far, so good.
I turned the tap on at about 1:15pm... we'll see how long this takes.
Oh, and as the weight of the water pushed the tarp down, I *did* have to unroll some of the unsecured tarp back into the rink...
Saturday, November 25, 2006
The Boards
Today we picked up 4, 4x8x3/4" sheets of plywood to use as the boards on the far end of my rink. They will be framed by 1x3 pieces of lumber and suppported by 2, 2x4's on each section. To fully board in my rink, I'll have to pick up 4 more sheets for the other end (another $100) plus another 3-4 sheets for the half boards along the side - I'm going to cut a 4x8 sheet in half to get 2, 2x8 sheets... So the side boards will be roughly 2.5 feet high.
Thanks for the help today Laura. :)
Wednesday, November 22, 2006
The Frame is done!
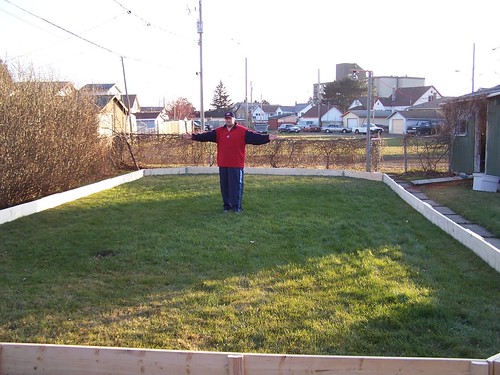
There it is! The frame is all done... Took about 4 hours to do, once everything was said and done. My costs fell pretty much exactly where I thought. I did buy two more 2x10x12's just in case... I didn't need them, so I'm going to turn them into benches to put in the warming shed.
After much humming and hawing, I made up my mind and decided to go with the angled corners, much like one would find at a city run outdoor rink. It was a bit more work for sure, but I'm pretty happy with the result. I used an angled mounting bracket to secure the 2x10's, then put a peice of strapping on the rear side... Then I pounded in 2, 2x4 stakes (they're almost 18"'s into the ground) on each angle.... And screwed the stakes into the 2x10's.
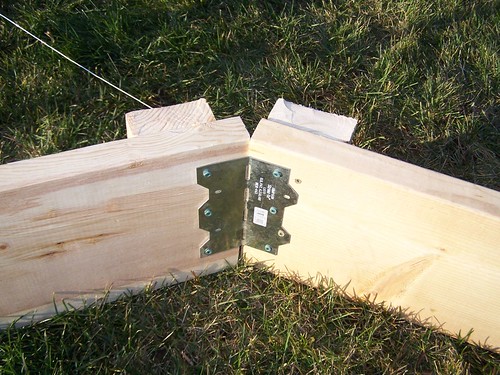
This is my biggest conern - that my corners won't be strong enough, and that they could end up bursting open once the pressure of the water is applied. I guess we'll just have to wait and see. :)
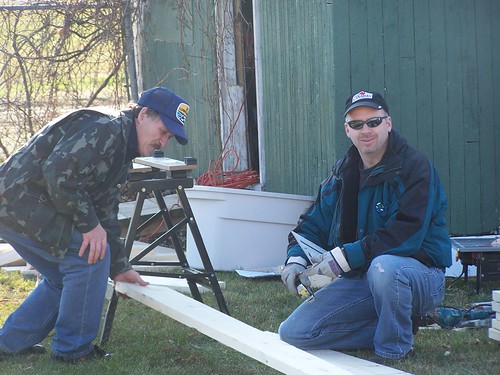
Big thanks to one of my best friends Jeff, and my neighbour Tony who helped me get this phase of the project done! Seemed like they enjoyed themselves as well - it was a fun project to do today - and the +10C temperature didn't hurt.
Sunday, November 19, 2006
More! MORE!
So today I dropped back in to Canadian Tire and picked up another 500w Halogen and the mounting hardware/box for it ($30). After wiring the light up, I attached it to the corner of my deck. I'm not sure if thats where it's going to stay, but my options are pretty limited unless I sink another 10' 4x4 in my yard... Tonight before work, I turned both lights on and stood in the "rink" area... There was ample light, but the only problem I can forsee is the # of hard shadows created. To alleviate that, I think the only thing I CAN do is hang some overhead lighting. THAT might be a project for next year, depending on how the ice goes THIS year. :)
Either way, a 2nd light is up, and I anticipate putting down the lumber this week!
Either way, a 2nd light is up, and I anticipate putting down the lumber this week!
Friday, November 17, 2006
... and then there was light!
So yesterday I dropped in to the Home Depot, after getting my BOGO card (Buy one, get One - that just happens to have the 10% discount stickers in it) and picked up my liner... It measures 30x60, for $86. A little pricey, but I hope to get at least 2 years out of it. I'll have to trim it down of course, but that beats buying a liner that is too small - or needs to be glued together to make a big enough surface. I then swung over to Canadian Tire and picked up a 500w halogen outdoor flood light, and the outdoor electrical box/cover to hook it up to.
Putting the light up turned out to be a bit of a frustrating experience. The 10' 4x4 pole that I was going to use to mount the light on - was set in such a position that if I mounted the light to it, the light wouldn't have shone ON the rink. (There's no horizontal movent to the light, just vertical) So to get around this, I screwed a 2' piece of 2x4 onto the top of the pole. This gave me the ability to mount the light under it, and adjust to to shine where it was needed. The greatest part... When it was up there... I plugged it in.... AND THERE WAS LIGHT! :D
I won't be able to see how well it lights up the backyard until tomorrow - as I'm working midnights... but I've already decided to add a second 500w light at the other end - either off of the corner of the house or on the corner of the deck.
Probably next Wednesday I'll get started on the frame. Can't wait. :)
Thursday, November 16, 2006
Let there be light!
I've decided to install a 500w halogen light on the top of my existing 4x4 clothes pole... I'm also going to pick up my liner from Home Depot in the morning.... Just have to get my hands on a BOGO card first to save me 10%. :)
Wednesday, November 15, 2006
So it begins...
For years I've been intreagued by the thought of having my own rink in my backyard... I've hummed and hawed about it...
"Yard isn't big enough."
"Theres a semi-rink just a couple blocks away."
"Its a lot of work and effort, not to mention $!"
To hell with it, I said to myself.
So this is the year I'm going to give it the old 'college try'. It started out with the unceremonious removal of a tree that happened to be planted right smack dab in the middle of the yard. I didn't plant it there... and to be honest, that thing has bugged me for years. It didn't grow properly, and the trunk was all twisted - this lead to only live stuff growing on 1/2 the tree. Oh, and did I mention it is RIGHT in the MIDDLE of the yard? I might have.So, with axe in hand and saw in tow, the tree fell. I placed some mulch over the whole, and the yard has instantly become more spacious. This will even help out next spring when I put up Hannah's soccer net. :)
That being done, I shot over to the old Home Depot and picked up some ground stakes and string to measure out and mark the area where the rink will go... After multiple measurements, remeasurements and inner discussions with myself, I've settled on a 48x22 size rink (roughly).
Hopefully I haven't gone TOO big on my first rink. Only time will tell there.I've also priced out wood/liner/screws etc, and I should be able to get it up for under $500 when its all said and done.
Subscribe to:
Comments (Atom)
